
Synchronize Folders#
Synchronization#
Files can be synchronized by selecting the directory to synchronize in the browser and select File → Synchronize. You will be prompted to select the directory on your computer to synchronize the files with.
Important
The options in Preferences → Transfers → Timestamps must be enabled.
Synchronization is based on the modification date and checksum of the files when available. You will be prompted to confirm the actions and if missing files should only be downloaded, uploaded, or mirrored.
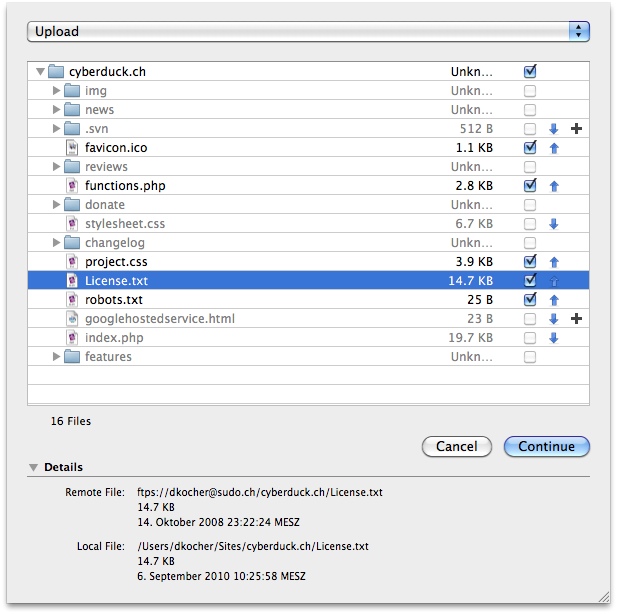
Checkbox: Toggle to include or exclude files or directories from the transfer.
Down Arrow: The file is downloaded from the server replacing the local file if included.
Up Arrow: The file is uploaded to the server replacing the remote file if included.
Plus Sign: The file does not exist and will be newly created when transferred.
Mirror Files#
Files are transferred in both directions and created if missing or replaced with the newer file on either system depending on the timestamp.
Only Download Files#
Files are downloaded that match one of the following criteria:
Do not exist on the local filesystem
Have a different checksum
Have a newer timestamp on the server
No files are uploaded.
Only Upload Files#
Files are uploaded that match one of the following criteria:
Do not exist on the server
Have a different checksum
Have a newer timestamp on the local filesystem
No files are downloaded.
Other Solutions#
You have to manually restart the synchronization in the transfer window. If you want to automate things you will be better off with either
Cyberduck CLI which allows you to write a script and schedule it with your preferred method such as
cron.Mountain Duck which allows you to mount the remote volume and synchronise files with any of your preferred tools such as
rsync.