Preferences#
General#
Save Workspace#
Save all mounted volumes when quitting to be restored when relaunching.
Tip
If you enable Save Workspace and Enable Login Item within Preferences → Login Item and do not manually eject the volume prior to quitting Mountain Duck, it will reconnect after login.
Bookmarks#
Change the size of the menu items in the status bar menu. Choose between Small, Medium, and Large icons.
Sync#
Connect Mode#
Change the default synchronization option. You can disable synchronization by default for all bookmarks by switching to Online. Refer to Connect Mode
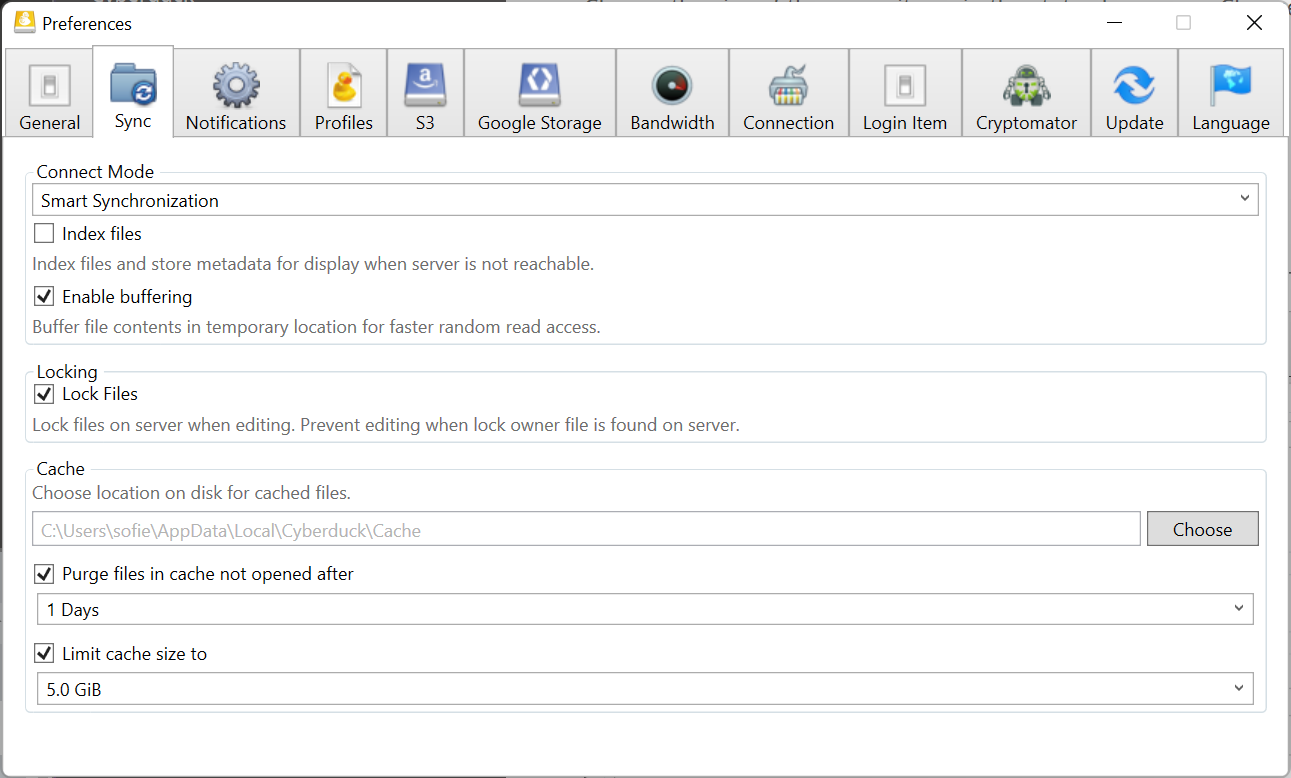
Index Files#
Index files on the server for a mounted connection in the background after connecting to ensure you can browse all directories when offline. Enabling this option will make sure new files available on the remote storage are detected without manually choosing Reload in the context menu. When enabled, remote directories previously opened are polled for changes and new files periodically every 10 minutes.
Warning
This feature is not available in Online connect mode. You cannot browse folders or open files as soon as the server connection gets interrupted.
Enable Buffering#
Choose whether the file contents should be buffered. The option allows buffering file contents in a temporary location which is only deleted when quitting the application.
Allows faster access when reading or writing files with random access patterns from applications in Online mode.
With the option enabled in Smart Synchronization mode, buffered file contents will be copied to the cache and the file can be opened when offline. Refer to Status of Files.
Temporary Files#
Buffered files are saved in the folder Temporary in the Cache Location.
Lock Files#
Enable to prevent conflicting edits when accessing documents from a shared environment. Refer to File Locking.
Mount Location#
Volumes are mounted in the Volumes folder in the application support directory. You can change the default to another folder that is writable.
Mac App Store
The setting is not available in the version installed from the Mac App Store. Make sure to change the mount location back to default before using the App Store version of Mountain Duck otherwise you may experience permission issues.
macOS only
The default is set to ~/Library/Application Support/Mountain Duck/Volumes.noindex. The mount location cannot be set to /Volumes where the directory is not writable.
Attention
Custom mount location is not honoured in Integrated connect mode but always in ~/Library/CloudStorage. Changing the connect mode to Integrated will cause applications to fail open recently opened documents because due to the change of the folder location not matching the previous volume.
Cache Location#
Change the location where to store cache files required for offline access. By default the Cache folder is in the application support directory. The disk must be formatted as HFS+ or APFS.
Attention
Custom cache location is not honoured in Integrated connect mode but always in ~/Library/CloudStorage.
Change the location where to store cache files required for offline access. By default the Cache folder is in %LocalAppData%\Cyberduck. You must select NTFS formatted drives with support for NTFS Alternate Data Stream (ADS). FAT, FAT32, exFAT, and similar formatted drives are not supported. Network drives may not support alternate data streams as well.
Warning
Do not manually move, delete or modify files in the obfuscated local cache location.
Cache Limitations#
Periodically free up space with cache limitations to purge unused files from the cache at regular intervals in the background keeping only a placeholder with metadata. You can choose a limit for the synchronization cache per bookmark and can select a timeframe for unused files to be purged.
The following options are available:
Limit by size. Limit cache size per bookmark by selecting a maximum folder size within the preference. Exceeding the maximum cache size, larger files are purged first.
Limit by time. Purge files not accessed within a selected period of time automatically.
Tip
Files selected to always keep offline are never automatically removed from the cache.
By default, files are kept in cache for 30 days and the cache is limited to a maximum size of 5GiB.
Attention
The settings apply separately for each bookmark. The synchronization cache gets cleared based on the chosen cache limit after Mountain Duck is started and every 24h as long as Mountain Duck is running.
Note
With Integrated connect mode, the operating system may automatically remove cached files not selected to keep offline to free up disk space.
Notifications#
Set which type of notifications you want to receive. Alternatively, you can choose Open System Preferences to disable the notifications all together.
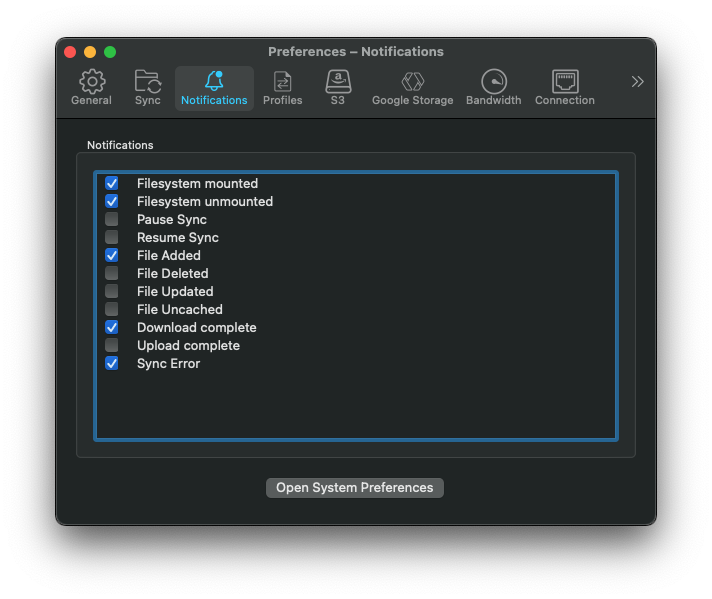
You can disable notifications in System Preferences → Notifications. Choose None for alert style and keep checked Show in Notification Centre. This way you will no longer be disturbed by any notification displays, but can still check back the notifications in Notification Center anytime if required.
You can disable notifications in Settings → System → Notifications and Actions. Uncheck Show notification banners and Play a sound when a notification arrives. Keep Show notifications in action center to see the notifications in Windows action center anytime if required.
Profiles#
Select connection profiles to be installed. Either scroll through the list or use the search function to look for a specific profile. The connection profiles will be installed after ticking the corresponding checkboxes. Installed protocols are displayed in the protocol dropdown menu in the bookmark window. To disable the connection profile simply untick the checkbox.
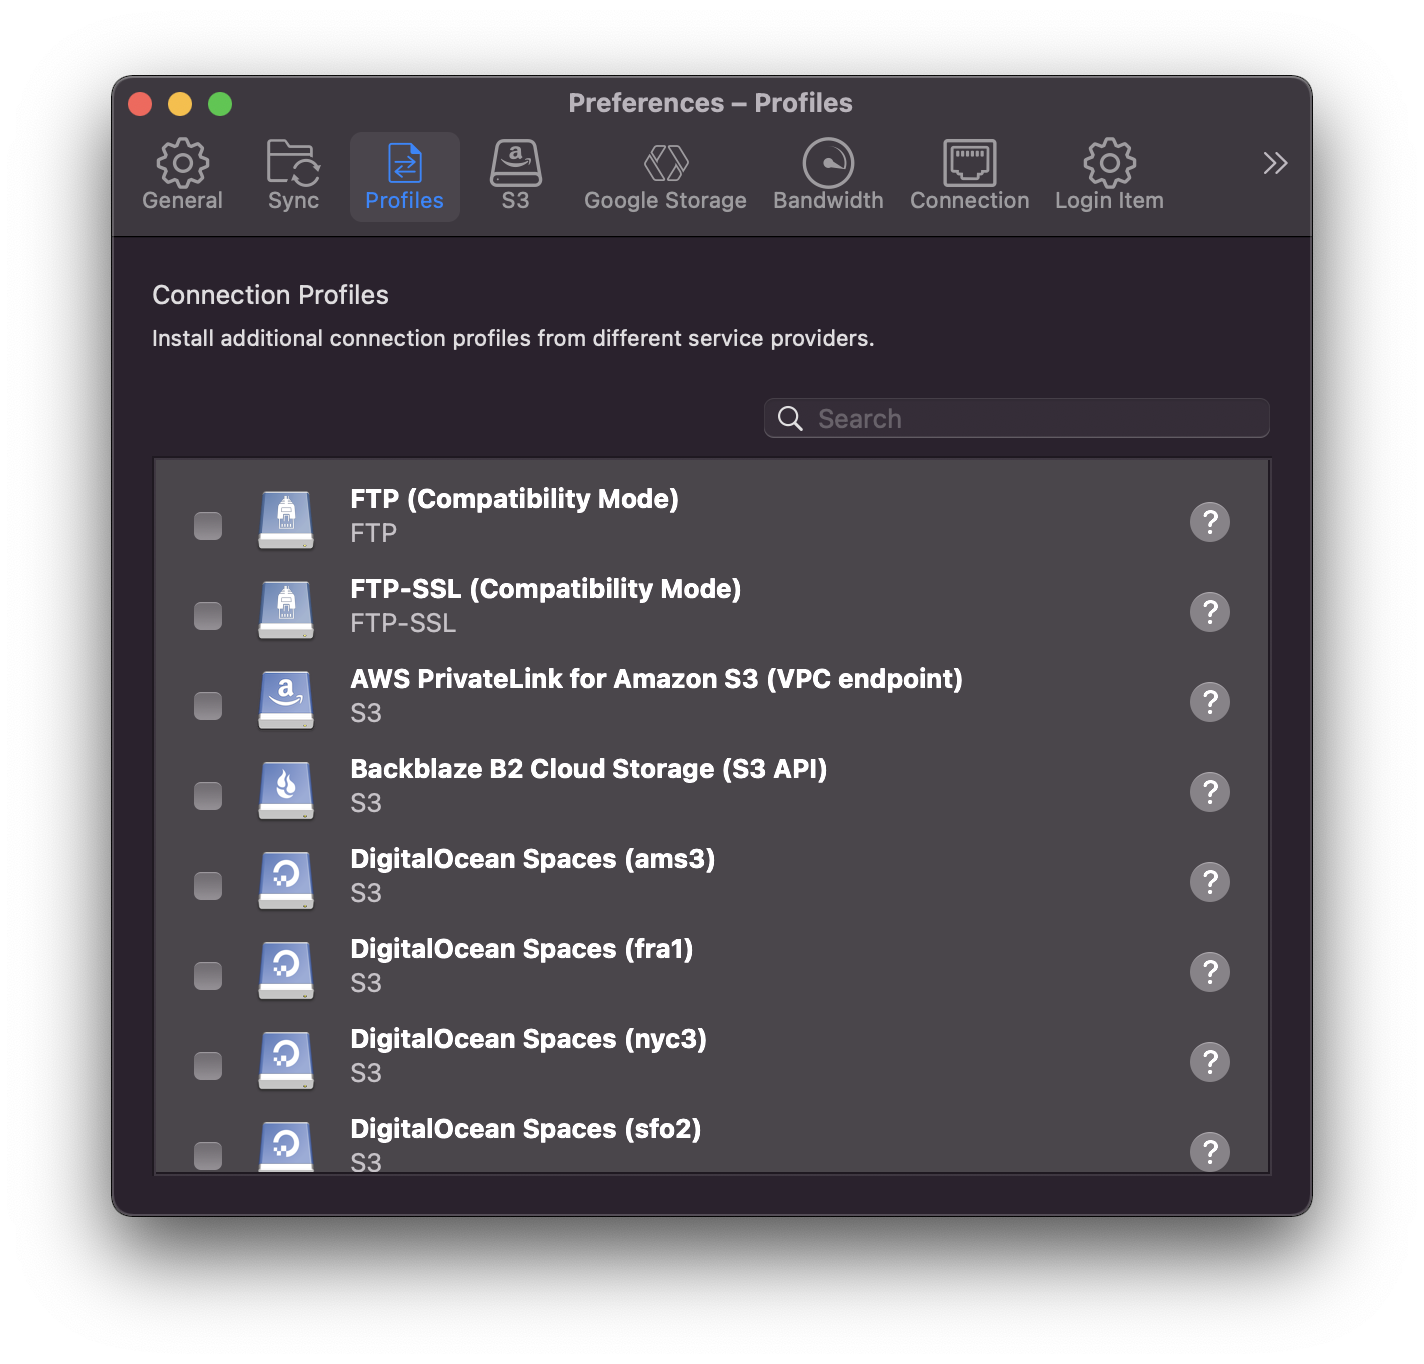
Default Connection Profiles#
The connection profiles for default protocols are always enabled.
Login Item#
Open Mountain Duck after restarting the computer.
Tip
If you enable Enable Login Item and Save Workspace in Preferences → General and do not manually eject the volume prior to quitting Mountain Duck, it will reconnect after login.
Cryptomator#
Choose whether or not your Cryptomator vaults should be auto detected and unlocked while browsing the parent folder or not by using the Auto detect and open vault in browser option.
Note
Without saving the vaults passwords using keychain, you will receive passwords prompts for the vaults after reconnecting to the server or cloud storage.
Use Keychain#
Specify if you want the Save Password option enabled by default while entering the password to unlock your vault. With the option disabled you have to check the checkbox to save the password in keychain manually.
Updates#
An auto-update feature will alert you when a new version is available and self updates the application. Choose Preferences → Automatically check for updates. You can also choose to update to snapshot or beta builds.
Snapshot builds: Include the latest changes and are published continuously. These builds are not manually tested.
Beta builds: Published before a release and include the latest features and have been tested but might not have release quality yet.
Windows only
You receive no update notification if your user is missing administrator permission.